Your roof is more than shingles. It's a system of layers working together to protect your home from water, wind, and temperature extremes. Understanding the anatomy of a roof helps you communicate with contractors, spot problems early, and make better decisions about repairs or replacements.
This guide breaks down every roofing component-from structural framing to surface materials. You'll learn what each part does, why it matters, and how these pieces create a system designed to last decades. We skip the jargon and explain everything in plain language you can use immediately when talking to roofers or inspecting your own property.
Understanding the Basics of Roofing Anatomy
Think of your roof like a body. You wouldn't schedule surgery without understanding basic human anatomy, right? The same logic applies before discussing a roof replacement. The difference between decking and underlayment matters when you're making decisions that affect your home's protection and your budget. A roof consists of dozens of components working together-some visible from the ground, others hidden beneath the surface-each serving a specific purpose in keeping water out and maintaining structural strength.
Why Knowing Your Roof's Structure Matters
You'll communicate more effectively with contractors when you understand what they're discussing. When a roofer mentions "replacing the drip edge" or "upgrading the underlayment," you'll know exactly what work you're paying for and whether it's genuinely necessary. This knowledge helps you identify warning signs during estimates-like a contractor who brushes past critical components or suggests shortcuts that sacrifice long-term durability.
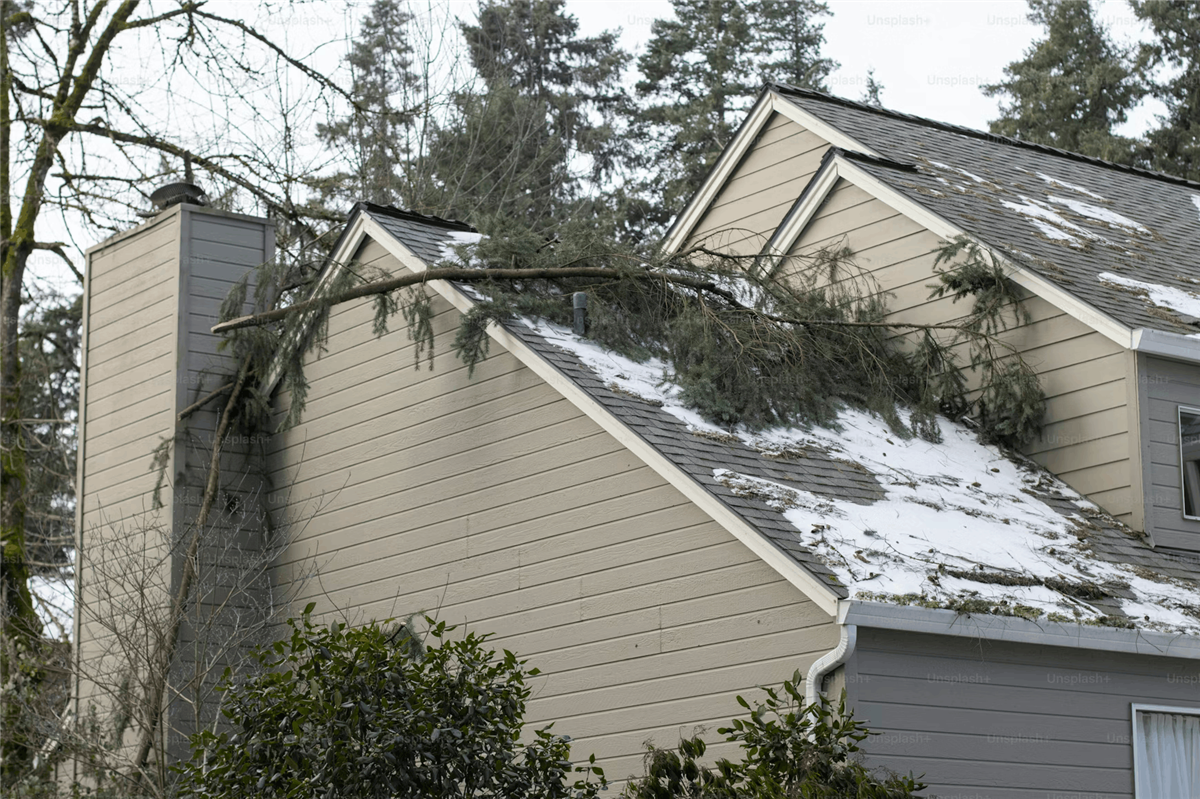
Understanding roofing anatomy also helps you catch problems before they escalate. That water stain on your ceiling doesn't just mean "bad roof." It might point to failed flashing around a chimney, damaged valley metal, or poor ventilation causing condensation issues. When you know how these systems connect, you can describe issues accurately during inspections and make smarter repair-versus-replace decisions.
| Homeowners who understand their roof's structure save an average of 15-20% on repairs by accurately identifying problems and avoiding unnecessary work. |
Insurance claims become simpler too. After storm damage, you'll document specific components that need replacement rather than vaguely reporting "roof damage." This precision speeds up claims processing and helps ensure you receive fair compensation.
The Two Main Categories: Structural and Surface Components
Roofing anatomy breaks down into two main groups. Structural components include everything that supports the roof and gives it shape-trusses, rafters, and decking. These elements bear the weight of everything above them and transfer loads to your home's walls and foundation. You rarely see these parts unless you're in the attic or during a complete tear-off.
Surface components handle weather protection and water management. This category includes shingles, underlayment, flashing, ventilation systems, and accessories like drip edge. These parts face constant exposure to sun, rain, wind, and temperature swings. Most repairs and replacements involve surface components because they wear out faster than structural elements. Understanding both categories helps you grasp how damage in one area affects the other-and why cutting corners on "invisible" components always creates bigger problems down the road.
Core Structural Components of a Roof
Below the shingles you see from the street lies the framework that carries the weight of everything above it. These hidden layers determine whether your roof stands for 50 years or sags after the first heavy snow. Let's examine the three critical structural elements that form the backbone of every roof system.
Roof Trusses and Rafters: The Skeleton
Your roof's shape and strength start here. Trusses are pre-fabricated triangular frames built in factories, delivered to job sites, and lifted into place by crane. They're engineered to specific load requirements and span distances that traditional framing can't match. Most homes built after 1960 use trusses because they install faster and require fewer interior load-bearing walls.
Rafters work differently. These individual boards get cut and assembled on-site by carpenters. You'll find them in older homes, custom builds, or situations where truss manufacturing isn't practical. Rafters give you more attic space-useful if you plan to finish that area later-but they cost more in labor and typically require more interior support.
Both systems transfer roof loads down through your walls to the foundation. When contractors talk about "engineered" versus "stick-built" roofs, they're distinguishing between trusses and rafters. Neither is inherently superior; the right choice depends on your home's design, budget, and whether you need open attic space.
| Trusses typically cost 30-50% less in labor than rafter systems because they install faster and require less skilled carpentry work on-site. |
Decking (Sheathing): Your Roof's Foundation
Decking creates the solid surface that holds your shingles, underlayment, and all the protective layers. Walk into any attic and look up-those boards or panels you see are the underside of your roof deck. Modern homes use oriented strand board (OSB) or plywood in 4×8 sheets, fastened directly to trusses or rafters with nails spaced every six inches along the edges and twelve inches in the field.
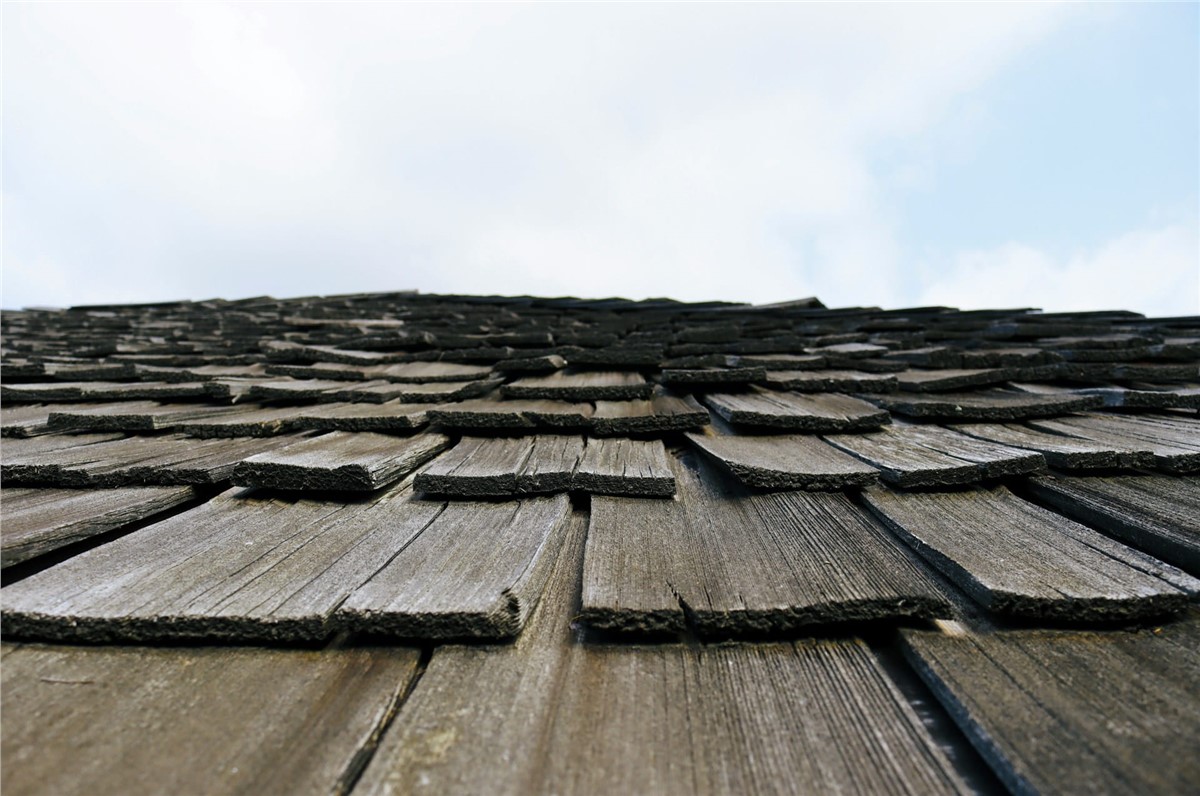
Plywood costs more but handles moisture better than OSB and holds fasteners more securely over time. OSB dominates new construction because it's cheaper and performs adequately when properly installed and protected. Older homes sometimes have solid wood planks instead of sheet goods-beautiful to look at but harder to seal against water intrusion.
Thickness matters for wind resistance and load capacity. Most residential roofs use 7/16-inch or 1/2-inch decking, but high-wind zones or heavy tile roofs need thicker material. Gaps between panels allow for expansion during temperature swings. When decking fails-usually from prolonged water exposure or poor installation-you'll see sagging sections, spongy spots when you walk the roof, or visible damage from below.
Decking Material Comparison
Here's how the three main decking materials stack up against each other when it comes to cost, moisture resistance, and ideal applications:
Material | Cost | Moisture Resistance | Best Use |
|---|---|---|---|
| OSB | Lower | Moderate | New construction, budget-conscious projects |
| Plywood | Higher | Better | Coastal areas, premium builds |
| Solid Wood Planks | Highest | Variable | Historic restoration, custom work |
Underlayment: The Protective Barrier
This waterproof membrane sits directly on top of your decking, beneath the shingles. It's your second line of defense against water-and sometimes the only barrier when wind lifts shingles or ice dams form. Standard felt paper (15-pound or 30-pound) dominated for decades but tears easily and breaks down in sunlight. Synthetic underlayment now replaces felt on most quality jobs because it's lighter, stronger, and lasts longer if a roof sits exposed during construction delays.
Premium projects use self-adhering membranes in vulnerable areas-valleys, eaves, around chimneys, and along rakes. These sticky barriers bond directly to decking and seal around fasteners, creating a watertight shield where leaks typically start. Code requires underlayment on every roof, but quality varies dramatically. Cheap felt disintegrates after a few months of sun exposure. High-grade synthetic can sit uncovered for six months without failing.
Your roofer should lap each row of underlayment at least four inches over the previous course, starting from the eaves and working toward the ridge. This shingle-like overlap directs water downward and prevents backflow. When contractors skip or skimp on underlayment-cutting corners you can't see from the ground-you're gambling that your shingles will never fail. They always do, eventually.
Essential Surface and Protective Elements
Once the structural framework stands strong, everything else focuses on one job: keeping water out. The layers you see from the ground-and the accessories you don't-form an integrated defense system. Each component handles a specific vulnerability where water tries to breach your envelope. Skip one element or install it poorly, and you've created an entry point that will cost thousands to fix later.
Shingles and Roofing Materials
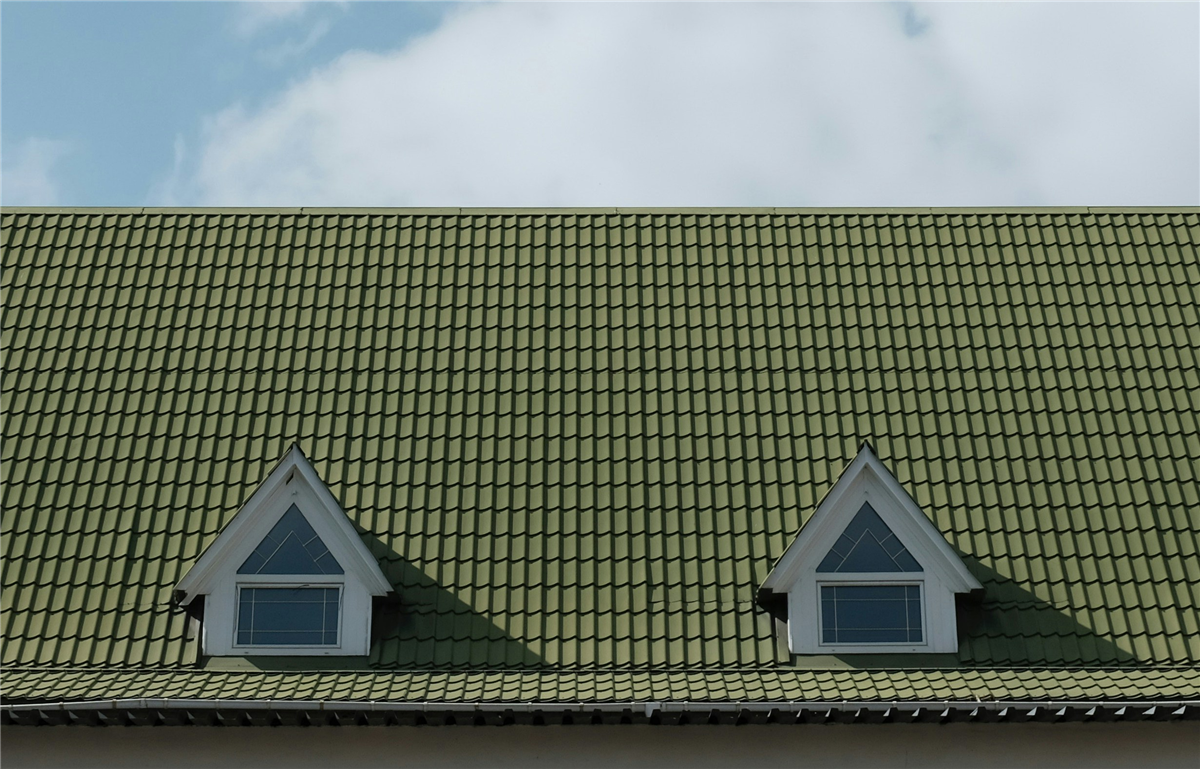
Asphalt shingles dominate residential roofs because they balance cost, durability, and ease of installation. Standard three-tab shingles last 15-20 years in moderate climates. Architectural (dimensional) shingles add thickness and texture, lasting 25-30 years and handling wind better. Premium options like impact-resistant shingles qualify for insurance discounts in hail-prone areas and carry Class 4 impact ratings-the highest available.
Metal roofing costs two to three times more upfront but lasts 40-70 years with minimal maintenance. Standing seam panels shed snow effortlessly and handle low pitches that would trap water under shingles. Tile and slate represent the premium tier-beautiful, fireproof, and lasting 50-100 years, but requiring engineered support because of their weight. Your choice depends on budget, climate, and how long you plan to own the property. A 20-year shingle makes sense if you're selling soon. Metal or tile pays off if you're staying put.
| The right roofing material for your climate can add decades to your roof's lifespan. Choose based on weather patterns, not just appearance. |
Flashing: Water's Worst Enemy
Flashing seals transitions where different surfaces meet-chimneys, skylights, walls, vents, and pipe penetrations. These metal strips (usually aluminum, copper, or galvanized steel) channel water away from vulnerable joints. Step flashing runs along sidewalls, with each piece layered beneath a shingle course. Chimney flashing uses a two-part system: base flashing attached to the roof and counter flashing embedded in mortar joints. Valley flashing protects the channel where two roof planes intersect-one of the wettest spots on any roof.
Poor flashing causes more leaks than any other roofing component. Roofers who rush this work create problems that won't show up for months or years. Quality installations use ice-and-water shield beneath the metal, seal all edges with roofing cement, and ensure proper overlap so water can't backtrack. When you replace a roof, replace all flashing too. Reusing old flashing around a $15,000 roof job to save $300 guarantees you'll be calling someone back within five years.
Drip Edge and Eaves Protection
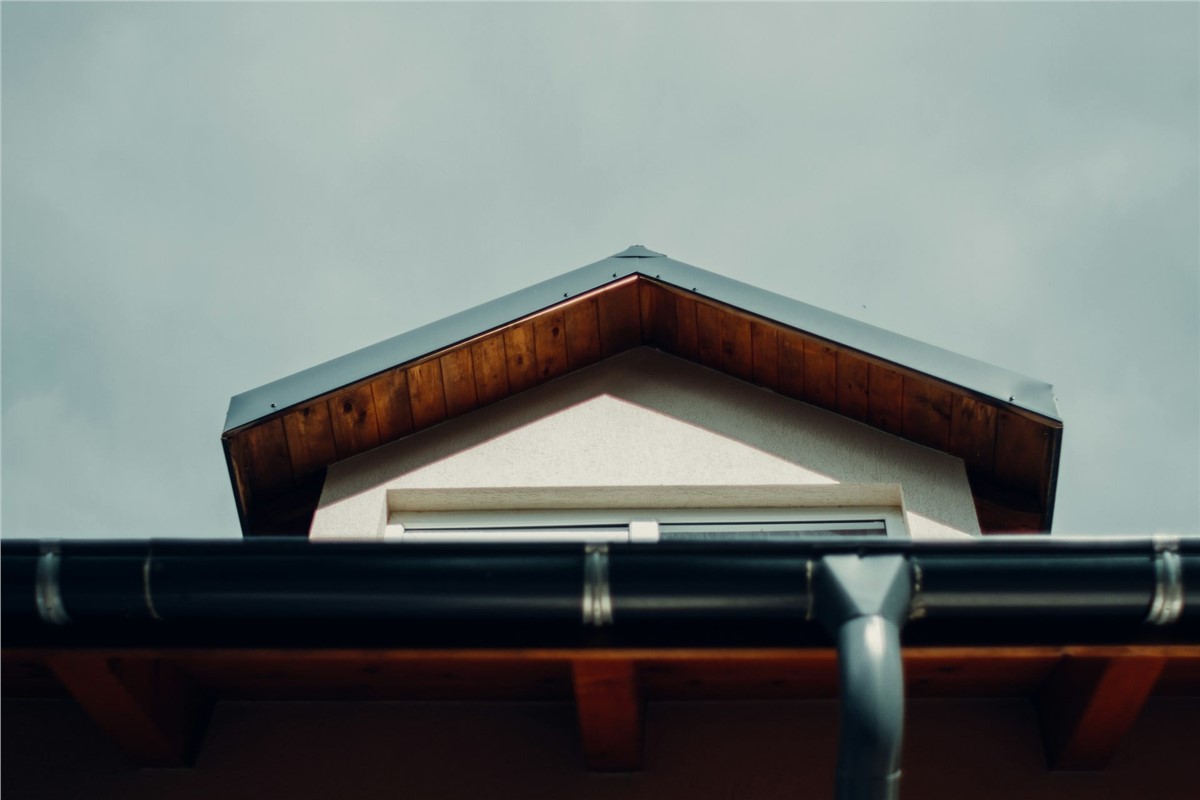
Drip edge is an L-shaped metal strip installed along rakes and eaves. It directs water into gutters instead of letting it run behind fascia boards where it rots wood. Building codes in most jurisdictions require drip edge, yet some contractors still skip it to save a few dollars. Don't let them. This $200 accessory prevents thousands in fascia and soffit repairs.
Ice-and-water shield goes on top of the decking along eaves-typically extending at least 36 inches past the exterior wall line. In cold climates, ice dams form when heat escaping through your attic melts snow. That meltwater runs down and refreezes at the cold eave, creating a dam. Water backs up under shingles and leaks inside. The self-adhering membrane stops this water even when it sits for days. If you live where temperatures drop below freezing, this protection isn't optional-it's insurance against interior damage.
Ventilation Systems: Ridge Vents and Soffit Vents
Attic ventilation removes heat and moisture that build up beneath your roof. Without it, summer temperatures in your attic can hit 150°F, cooking your shingles from below and shortening their lifespan by years. Winter condensation from household moisture leads to mold, rot, and ruined insulation.
Here's how balanced ventilation works:
Cool air enters through soffit vents: installed in the eaves, pulling fresh air into the attic space at the lowest point.
Air warms as it rises: through the attic, picking up heat from the roof deck and moisture from any interior sources.
Hot air exits through ridge vents: at the roof's peak, creating continuous airflow through natural convection.
Box vents or turbines supplement: ridge vents on complex roofs where continuous ridge ventilation isn't possible.
Baffles maintain airflow: between insulation and decking, preventing soffit vents from getting blocked by blown-in insulation.
Proper ventilation extends shingle life, reduces cooling costs, and prevents moisture damage-three benefits that pay back the installation cost many times over.
Valleys, Hips, and Ridges
Valleys channel tremendous water volume where two roof planes meet. Open metal valleys use exposed flashing. Closed valleys weave or cut shingles over the joint. Woven valleys work better in areas with moderate rainfall. Metal valleys handle heavy flow and ice better, though they cost more to install. The ridge cap-that peak line running along the top-uses specially designed shingles that bend over the apex and seal against wind-driven rain. Hip caps do the same job on angled roof ridges. These caps take more abuse than field shingles because wind hits them from both sides, so quality matters even more here.
When to Trust Professionals with Your Roof's Anatomy
Understanding roofing anatomy gives you valuable knowledge, but that doesn't mean every repair should be a DIY project. Some roof issues require specialized equipment, training, and warranty-backed work that only certified professionals can deliver. Knowing when to step back and call in experts protects both your safety and your investment.
Signs Your Roof Needs Expert Attention
Certain warning signs demand immediate professional evaluation. If you spot sagging sections anywhere on your roof, stop-this indicates structural failure in trusses, rafters, or decking that could collapse. Water stains spreading across your ceiling mean active leaks that have already penetrated multiple layers. Don't wait for these to "dry out." They won't.
Missing shingles after a storm might seem like a simple fix, but professionals need to inspect what's underneath. Wind that tears off shingles often damages underlayment and flashing too. Reattaching shingles over compromised barriers just postpones bigger problems. Daylight visible through your attic boards signals gaps in decking or failed seals around penetrations-both require immediate professional repair before the next rain.
| Catching roof damage early and hiring qualified professionals can prevent repair costs from escalating by thousands of dollars. |
Granules collecting in your gutters tell you your shingles are breaking down. Once asphalt shingles lose their protective granule layer, UV rays accelerate deterioration. A professional assessment determines whether you need targeted repairs or a full replacement. Ice dams forming along your eaves point to ventilation problems or insufficient insulation-issues that require attic inspections and systemic fixes, not just scraping ice.
How Comprehensive Roofing Services Protect Your Investment
Professional roofing companies bring more than ladders and nail guns. They carry liability insurance that protects you if someone falls or property gets damaged. Their work comes with warranties covering both materials and labor-protection you forfeit with DIY repairs. Factory certifications mean installers follow manufacturer specifications exactly, which keeps your product warranties valid.
NV Roofing has served the Northern Virginia, Maryland, and Washington, D.C. region since 1963, combining decades of hands-on experience with factory-certified installation standards. Residential services include complete roof replacements using high-quality shingles, metal, and specialty systems, plus emergency storm damage restoration with insurance claim support. Every project starts with a thorough inspection that identifies problems you can't see from the ground-deteriorated underlayment, failed flashing, inadequate ventilation.
Professionals also understand local building codes and permit requirements. Installing new decking or changing roofing materials often requires permits and inspections. Contractors handle that paperwork and ensure compliance. They source materials at contractor pricing and know which products perform best in your climate. When you're comparing a 20-year architectural shingle against a 30-year impact-resistant option, experienced roofers explain the real-world differences based on your specific weather patterns and home design.
Quality roofing services extend beyond the roof itself. Seamless gutter systems, properly sized downspouts, and gutter guards prevent water damage to foundations and landscaping. Siding replacements using premium materials like James Hardie fiber cement improve both durability and curb appeal. Energy-efficient window installations reduce heating and cooling costs while improving comfort. These integrated exterior solutions work together to protect your home from top to bottom. Get a free quote to see how professional roofing services can protect your specific property.
Conclusion
Your roof's anatomy represents an interconnected system where every component-from hidden trusses to visible shingles-plays a specific role in protecting your property. Understanding how decking supports underlayment, how flashing directs water away from vulnerable joints, and why ventilation extends material lifespan helps you make better decisions about maintenance, repairs, and replacements. This knowledge helps you evaluate contractor proposals accurately, catch problems before they escalate into expensive damage, and communicate precisely when discussing your home's needs with professionals. Whether you're planning routine maintenance or responding to storm damage, knowing what lies beneath those shingles transforms you from a passive homeowner into an informed decision-maker who can protect one of your largest investments with confidence.
FAQs
How often should I inspect my roof for damage?
Inspect your roof twice a year—once in spring and once in fall—plus after any major storm with high winds or hail. These regular checks help you catch minor issues like lifted shingles or damaged flashing before they turn into expensive leaks requiring full replacements.
What's the difference between rafters and trusses in roof construction?
Trusses are pre-built triangular frames installed quickly as complete units, while rafters are individual boards cut and assembled on-site by carpenters. Understanding this difference in the anatomy of a roof helps you recognize why trusses cost less in labor but rafters provide more usable attic space.
Can I replace damaged shingles myself or do I need a professional?
While replacing a few shingles seems straightforward, you should hire a professional to inspect what's underneath first, as wind damage often affects underlayment and flashing that you can't see. DIY repairs also void manufacturer warranties and may violate local building codes that require licensed contractors for roofing work.
When should I replace my entire roof instead of just repairing sections?
Replace your roof when it's approaching the end of its expected lifespan (20-25 years for most asphalt shingles), when widespread damage affects multiple areas, or when repair costs exceed 30% of replacement cost. Learning the anatomy of a roof helps you understand why patching surface problems won't fix underlying issues with deteriorated decking or failed underlayment.
Is roof ventilation really necessary or just an upsell?
Proper attic ventilation is essential, not optional—it prevents moisture buildup that causes mold and rot while extending shingle life by reducing heat that can reach 150°F in summer. Without balanced airflow through soffit and ridge vents, you'll face premature roof failure and higher energy bills regardless of how quality your surface materials are.
Subscribe to NV Roofing's Blog